Bee Candy (fondant)
Combine all ingredients and heat over medium heat in a 2 quart pan (for the small batch).
When preparing the batch for cooking, take care not to splash the sugar/water mixture in the pot, this will get sugar granules on the sides of the pot. I prefer to add the water first, then the sugar. I will gently stir the mixture just enough to get the components mixed.
The mixture will begin to bubble around the edges of the pot at about 196' and it will be at a full rolling boil at around 220' The mixture will be milky white from the sugar, as it begins to boil more, a small amount of foam will cover the top. Within seconds of it coming to a full boil, the mixture will instantly go clear and in less than 30 seconds later the foam will all but go away. I have found it helpful to boil the mixture with the cover on to begin with. This causes the steam to condense on the lid and drip down the sides of the pot washing sugar granules back into the mixture where they can be dissolved. Any granules that are not dissolved can cause the fondant become more grainy than desired as the sugar will seed the fondant with larger crystals. I have also found that when starting the process I have found it helpful to heat the mixture on lower heat until it has all dissolved, this limits the splashing of sugar onto the sides of the pot. Once the sugar has dissolved, and the foam has gone mostly gone away, remove the lid.
This is now the point I will add the corn syrup. I simply found adding it at this point easier to incorporate as the corn syrup is so viscous, the higher temperature dissolves it faster and cleans my spoon quicker. Always feel free to experiment with the methods described here, these work well for me and as I refine my method, I do update this page.
Monitor until temp reaches 241-243 (This has worked best for me so far). You
are now just below the FIRM BALL STAGE * Note for those with electric
ranges, it will get up to temp. It may take a while, but it will get there. The
temperature of the product is directly related to the amount of water in the
mixture. What you are doing in the process is using the water to separate the
sucrose and fructose, brake the sugar, and incorporate more fructose, the corn
syrup, to reduce crystallization. The temperature will continue to rise as the water is
evaporated out.
*** CAUTION!!! Boiling sugar is dangerous and can cause
severe burns!!! ***
Turn off the heat and allow the mixture to cool. I no longer mix the sugar at this point, and I loosely cover to help prevent anything from getting into the mixture. Any foreign particles can cause granulation.
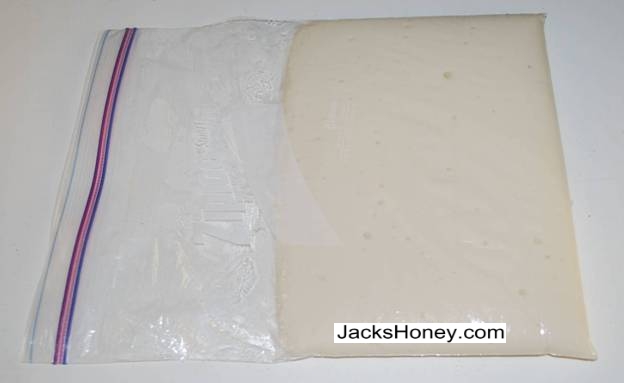
As the temp cools to around 200, remove the thermometer, its time to transfer to the zip lock baggie. I pour it at this higher temp to hopefully dissolve any crystals that may have formed on the sides of the pot and floated off during the pour. I avoid scraping the sides of the pot for this reason, only scraping the area in the pot where the liquid was.
I fold down the neck of the baggie so it will stand on its own, or better yet, have someone hold the baggie upright, but sitting on a solid surface. Avoid getting any of the mixture in the zipper. After getting as much out of the pot as possible, close the zipper most of the way, leaving about an inch opening at one side to allow air to escape while you flattening out the contents. Don't spend too much time scraping the pot as the mixture is solidifying fast. It's not necessary to get all the air out, and this part takes some practice. Remember this stuff is still liquid, and very hot to the touch. Once the air has been removed, make sure to close the zipper the rest of the way, and double check that it's closed tight. I think keeping the fondant in a plastic bag stops it from turning into a sweet ceramic tile buy stopping the evaporation of the water that's left. What ever you do, DON'T get the mixture in the zipper of the baggie; you'll never get the zipper to close again! Do not place the bag in the refrigerator or freezer, this can cause granulation also. There is no problem with granulation, I'm just looking to have a smooth product for the bees. Remember, they'll eat dry granulated sugar.
As the fondant is cooling in the baggie, I move it around the counter onto cool areas to pull the heat out. By doing this you keep the liquid moving and cooling more evenly. Continue doing this until you can handle the baggie, then continue kneading until it has cooled and no longer thickening. This will take some practice to get the feel. Be careful not to pop the zipper open, spilling out the contents. If this step is skipped, the fondant can harden to a block rather than a pliable taffy like consistency. I have been able to work the block back to the soft consistency, but it takes work.
If you simply boil and cool sugar alone, it can re-granulate and become crumply. The corn syrup keeps it moist and more like taffy. It will also keep the fondant smooth and less grainy.
While feeding plain table sugar is a well known emergency feeding method, the bees need some moisture to eat and process it. Giving them this candy is a way of them the carbs they need with some moisture. I have always given dry sugar around the opening in the inner cover, most of the time some of the sugar seemed to get used, but in the spring, I would find large piles of it on the bottom board mixed in with the bees that didn't make the winter. With this candy I can put it right on the top bars or on the inner cover where the bees do not need to go too far to get it.
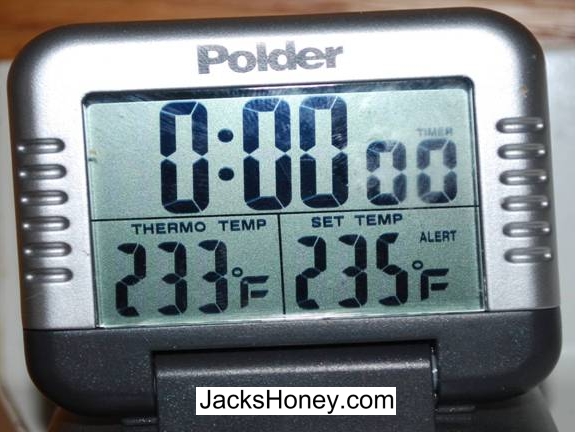
Here the thermometer's alarm is set to 235', the higher the temp, the stiffer the final product.
Through much more testing, I now bring the temp up to 241'-243' giving a much more firm result.
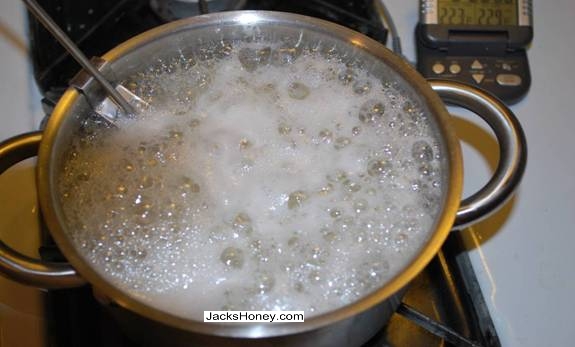
Here is the foaming that begins just before going clear at full boil.
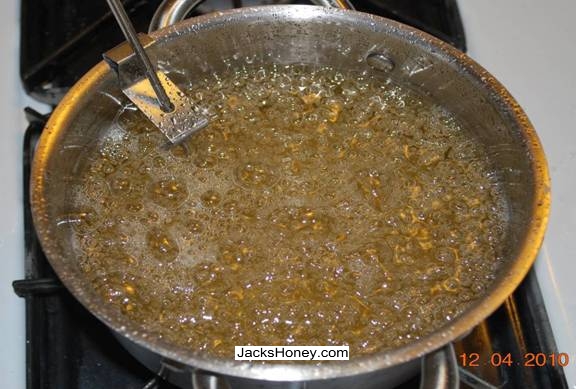
When boiling sugar, the bubble size changes as the temp goes up and the moisture level goes down.
This batch is squeezed down to fit a feeding frame I made to feed my top bar hive, I would normally flatten it out completely. You can stop the fondant from flattening out by folding the unfilled part of the bag under the fondant, otherwise it will keep flattening out on its own.
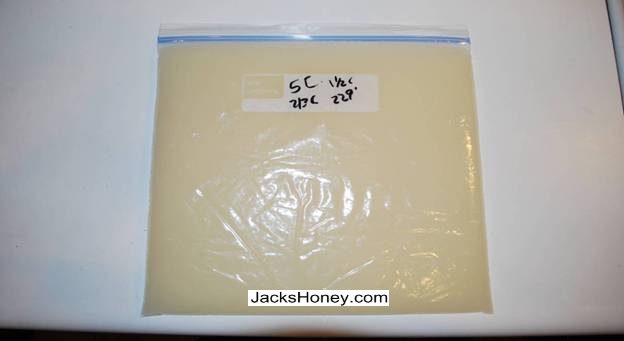
Fully flattened and details of the batch marked for research. 5C, 5 cups of sugar, 1C Water, 2/3C, Corn syrup, 229 degrees max. This batch had a little water after it cooled down. Moving up to 240'-245' seems better to yield a better product. Remember the lower the final temperature, the more runny the product will be in the hive. Too runny and the candy will drip down between the frames. I use a piece if wax paper to contain the candy, and to slow the evaporation of moisture.